- Joined
- Nov 10, 2014
- Messages
- 45
- Reaction score
- 25
- Points
- 18
- Age
- 35
- Steam
- Dad
A bit of background: I've recently switched from an xBox controller to the keyboard and I love it. I've only played for about two days, but already have a hard time picking a controller back up. My keys are mapped as closely to a HitBox as I could manage.
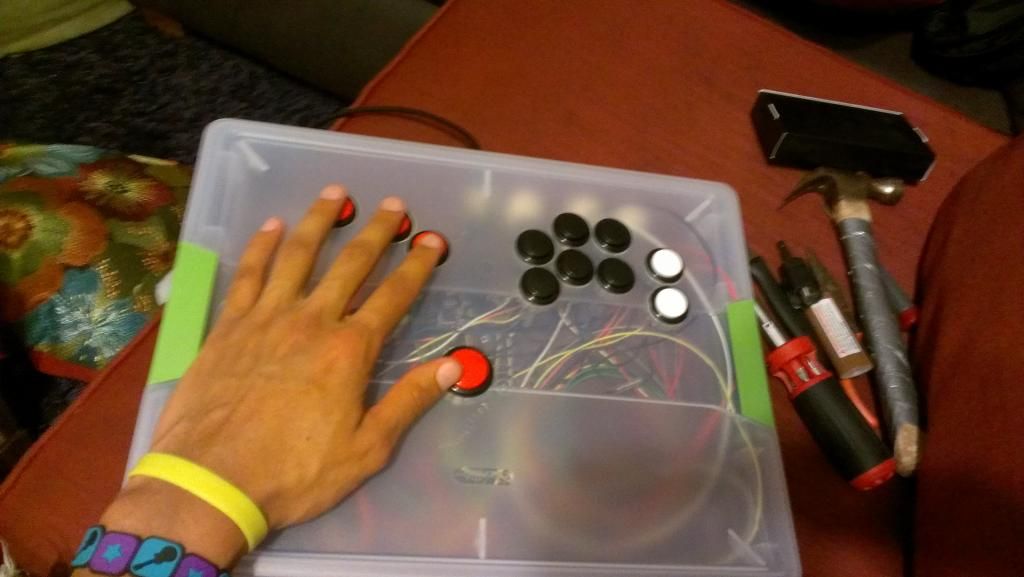
This moved me to want a HitBox—but have pretty big hands. I want the buttons to be laid out such that I can lay my hands flat, side-by-side, fingers somewhat spread, and be touching the buttons. From the looks of it, a HitBox is too small (that is, my wrist would have to arch a little, my fingers move closer to one another, and my thumb would have to shift towards my palm). Not only is this a bit less comfortable, but it's a recipe for carpel tunnel. Basically, I want to minimize the movement involved in pressing any given button, and minimize my hands' displacement from their natural position.
I'd have to slowly save the money, but I've been prompted to at least look into building my own custom HitBox, tailor made for my sweet, sweet hands. I've put together a few computers, though doing this seems to have little in common. I've got a few questions, if you folks don't mind:
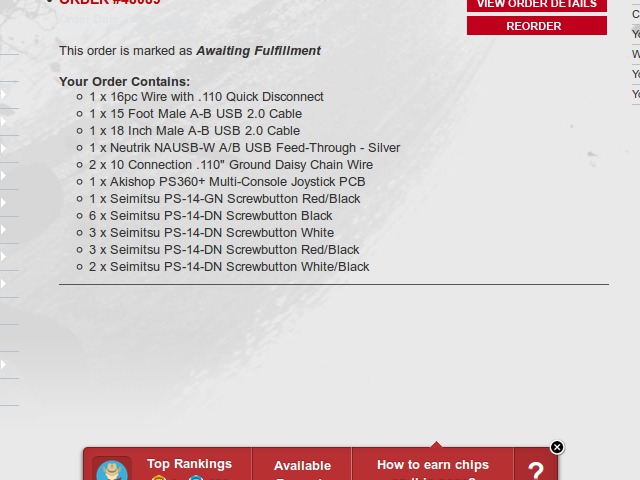
- How much experience should I have soldering and doing all that other good stuff? (Currently, I have zero)
- Approximately how much money would it cost assuming Sanwa parts and minimal everything else? (I don't care about aesthetics or weight for now; since everything's buttons, it won't be moving much)
- Are there people who would build it for me? (People who won't charge much more than just buying a HitBox, that is)
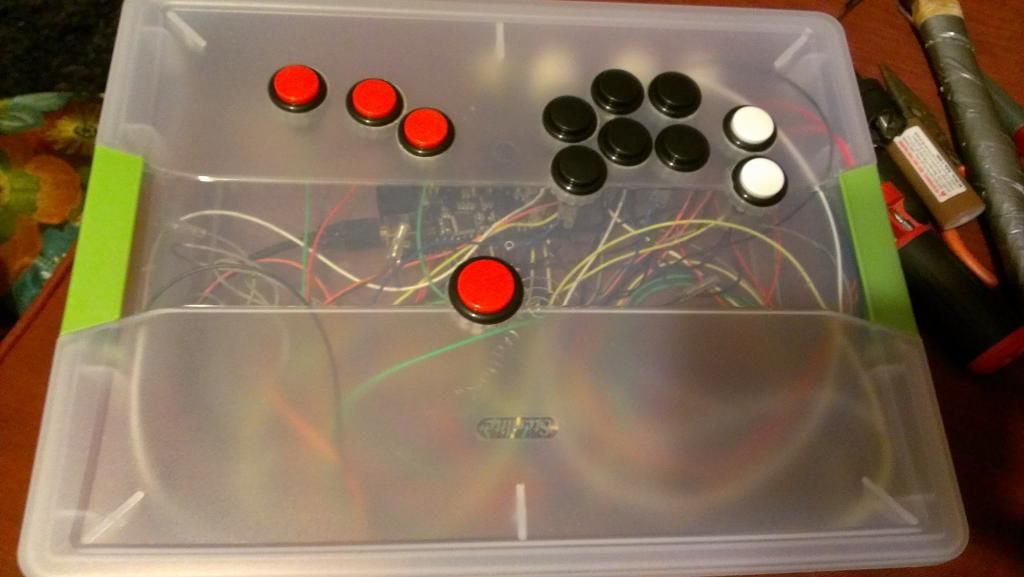
- Is... http://s19.postimg.org/717h14zqr/DSC00962.jpg ... a typical wiring job? Is wiring this as easy as it looks?
- To those that have done something like this:
- How simple was it?
- How experienced were you when you built it?
- Did you build it from scratch or mod. an existing fightstick?
- How much did it cost you?
- How long did it take?